October 31, 2012

Happy Halloween!


Halloween has been a busy time around here.  I've been baking and sewing up a storm to get ready for it.


 My bakery received an order for a Zombie cake.  I didn't get a photo of the fondant zombies, but here's the smores inspired cake.  It is a chocolate cake with a whipped icing and a graham cracker filling.  Oh and there's some blood on top.... don't worry, it's just raspberry jam.  Though that's homemade too!  I canned five jars of raspberry jam last week.


I had the worst luck with pumpkins this year.  A few friends came over a few weeks ago to carve their pumpkins, then left them at my place.  They became a breeding ground for flies within a day.  Ugh.  Then my original pumpkin (uncarved) molded before I could even carve it.  So here's my final pumpkin!  My inspiration was Inspector Spacetime from Community on NBC.  It's hard to see the hat and umbrella that really make it stand out in this photo though.


We threw a Halloween party and I had to do some baking for it.  It was an apple cider cake with a caramel frosting.  I also made an amazing homemade fall sangria that had apple cider, caramel, all sorts of seasoning, orange juice, brandy, and of course red wine.


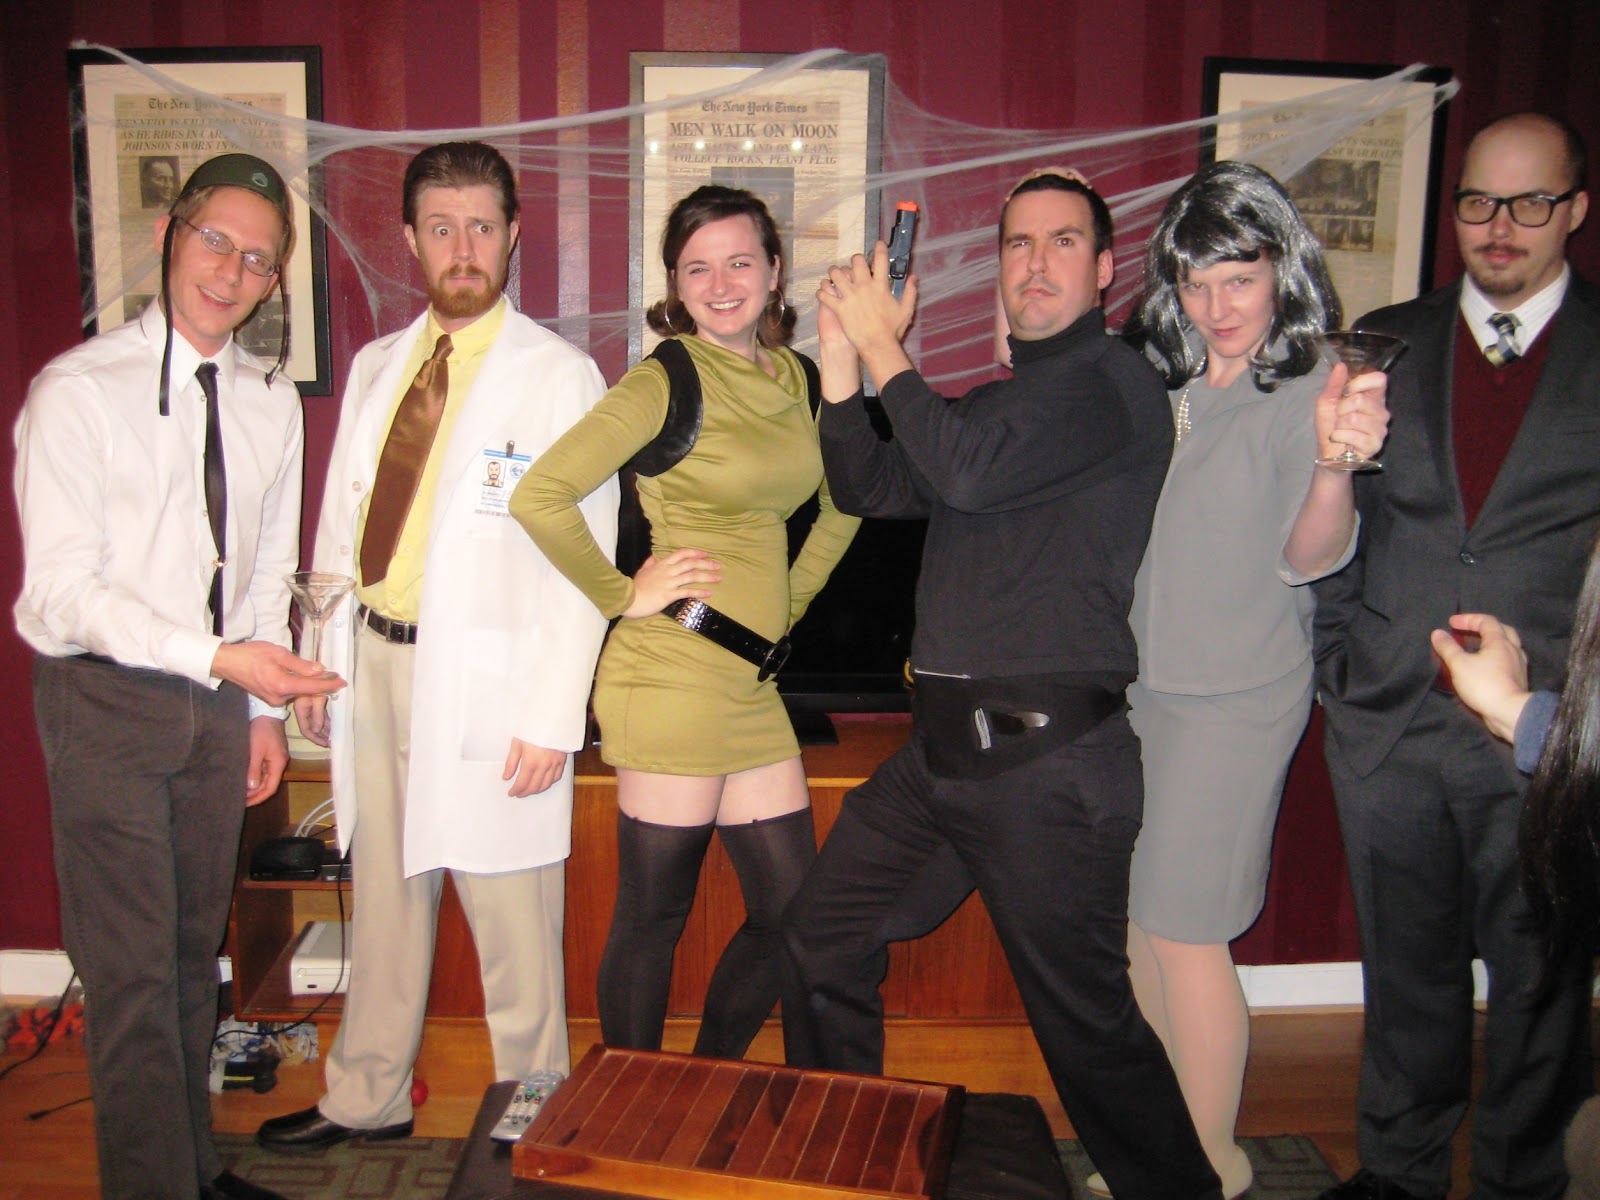
Now we move onto my costume!  I forgot to get more photos of it.  I am terrible at that.  I always end up with one group photo and not enough to really show off my costume.  My inspiration was Archer and this photo shows everyone in our group who also dressed up as characters.  And my whole costume was DIY and cost $8.  The "boots" used to be yoga pants that were too small and short to wear anymore.  I cut off the top and sewed them around a pair of heels so they look like thigh high boots now.  The dress was self drafted with a jersey fabric so it was really comfortable all night.  And the accessories were made out of faux leather I had sitting around from a few purses I made last year.  I love DIY costumes!


October 10, 2012

Halloween


I am usually terrible at coming up with costume idea for Halloween.  In my family, I stopped trick or treating when I hit middle school.  A few times in high school I'd go out with friends, but I'd never go up to the doors cause I felt like I was way too old for it.  But you'd think with my theatre and sewing background I'd love to dress up!  Well... I like wearing costumes, but I hate thinking them up.  I agonize over ideas for weeks and weeks before I often times settle on one at the last minute.  I've only ever put in time/work on a costume once before since I was little (and my mom was making my costumes then, I should try to find some photos of those costumes for everyone... they were awesome and diy!). 


Here I am at my first Halloween!  The family went as a marching band and I was the dance team.  I think the sock tassles are my favorite part.  The next photo is a few years later.  I'm a mommy!  I really hope my mom didn't dress like that... And my brother's costume too!  Though that doesn't look too homemade...


           Here I am as Wendy from Peter Pan.  I am rocking that hair bow and blunt haircut!  Haha.


The next year I went as Little Red Riding Hood.  My mom made the cape for me!  And then a few years later I was a jockey.  I loved this costume!  And my horse was our dog Sheena!


In college, I was in a theatre fraternity where we had a themed dance each year that I had to think up costumes for too!  You'd think I'd be much better than I am at this with my past experience. 


 Robin Sparkles from How I Met Your Mother and Laura Petrie from The Dick Van Dyke Show.


I went as a romance novel character... can you tell I like wigs?  Ok, I really don't, but you can't do much with short hair.


This year I get to participate in a group costume, so I don't have to think too hard!  Too bad I was thinking really hard about it for like a week before this.... but back to the costume!  I am going with a group of friends this year as characters from the TV show Archer.  If you don't know this show, it is an animated show (not for kids though) on FX.  And I get to DIY pretty much every piece of the costume!  More photos of the actual costume will show up as we get closer to the holiday!


What is your plan for Halloween this year?

September 28, 2012

Gourmet Bison Tacos with Cilantro Slaw

A few days ago I made the most impressive tacos to date and I mostly made up the recipes myself!  We bought a pound of  bison at Whole Foods, which was more than enough for my husband and I with all the other additions.  The recipes are all really easy, but you may end up with a lot of dirty bowls from preparation.


Bison Tacos

1 lb ground bison
Spices- onion powder, garlic powder, oregano, cumin, cayenne pepper

Cook the bison in a skillet.  Add seasoning to your liking with 1/2-3/4 a cup of water.  I used about a teaspoon of everything, two of cumin, and a dash of cayenne.  There wasn't too much kick, so next time I'd add more spice.  Simmer until the liquid is absorbed.  Serve.


Red Tomato Salsa

1 jalapeño
3 cloves of garlic
1 (15-ounce) can tomatoes
2 Tablespoons lime juice
1/4 cup chopped fresh cilantro
1/4 cup onion
salt to taste

Roast jalapeño in oven on broil for 10-15 minutes until the outside is brown and splotchy.  Remove from oven and seed the chili.  Toss the rest of the ingredients into a blender except cilantro and onion.  Pulse until it is mostly a liquid.  Toss in the cilantro and onion.  Stir.  Serve and enjoy!


Cilantro Slaw

1 cup shredded cabbage
1/2 cup chopped cilantro
1/2 jalapeño, seeded and chopped
1 T lime juice
1 T honey
salt to taste

Mix everything together and serve.


Peppers and Onions

2 poblano peppers
1/2 an onion, sliced

Saute peppers and onions until soft.  Serve with everything else!


You can also add on some avocado and cheese (montery jack) like we did in the first photo!

September 21, 2012

Nice to Meet You- Proudest Crafting!

I am joining in with a group of bloggers who are introducing themselves to each other through their blogs!  How else would we?!?  I first heard about it through bricks and baubles, but forgot to participate in the first one... fail.  So here I am! 

<div align="center"><a href="http://www.bricksandbaubles.com/2012/08/nice-to-meet-you-link-up.html" title="Nice To Meet You" target="_blank"><img src="http://farm8.staticflickr.com/7258/7718065076_8df146639a_m.jpg" alt="Nice To Meet You" style="border:none;" /></a></div>

This time we are supposed to post about the favorite things we have made!  I'm going to try to be diverse here with my list.  And all the photos link back to the original post so you can see more photos and sometimes a tutorial!


1.

I'll start out with baking.  I am very proud of a lot of my baking, but this takes the cake.  Haha.... takes the cake.... For my friend's birthday recently, I designed and created a cake based off of Doctor Who.  And this was the first time I created figurines out of fondant!


2.

My favorite pastime is sewing.  I worked in a costume shop in college, where I was tasked with sewing corsets!  There were three stages of sewing, rehearsal skirts, men's vests, and corsets.  I skipped the first step altogether and didn't spend much time on the vests once they realized I knew how to sew.  I became the resident corset maker.  This one was designed for a friend while in college working on A Christmas Carol.


3.

Here is some more sewing.  This was the first dress I created without using a pattern.  It was an upcycle of the bridesmaid dress from my parent's wedding.  Nowadays I probably combine patterns or don't use them at all most of the time, but this was my first try at it!  I wore it one night for a costume party and haven't put it on since.  I was supposed to be "Envy" from the Seven Deadly Sins.


4.

Here is my most proud interior decorating moment.  Our living room wall is painted maroon with matte and semi-gloss paint in a striped pattern that I created myself as an accent wall.  I did this whole job myself, which is a huge reason why I am so proud of it.  Also you can see my collection of newspapers on the wall!  Double proud moment!


5.

And some home decor for good measure.  I etched these glasses with etching cream as a gift to a friend.  This was my first time doing glass etching, but they turned out fantastically!  Though the next time I tried to etch a two pie plates, only one took.... boo Pyrex.


6.

Lastly, I'll go with some decorations from my wedding last year.  I DIY'ed a lot of it, though I don't know that anyone could really tell!  This was our card box (not DIY).  But the letters surrounding it were all made by me with names of our favorite couples from tv and movies (and all the addresses were from Chipotles... yeah....).  And the candle in the background, I DIY'ed by covering a large vase in twigs and wrapping it in raffia (though it looks a little lopsided in this photo).


August 17, 2012

How To: Pineapple Flowers!

This weekend is the Air and Water show in Chicago and we have a front row view!  Well... sort of... our windows face the area they turn around instead of the show itself... but they are still flying a couple hundred feet outside of our windows!

To watch the show, we've invited some friends over so I, of course, had to bake!  I thought pina colada cupcakes would be a nice summery treat for everyone.  And for decoration I made pineapple flowers.

All you need for this is a pineapple!  Nice and simple!


Next, you'll cut off the outside.  The holes in the pineapple below are there to get the last bit out so we have lots of usable pineapple.  (Did you know that you can plant the top of a pineapple and grow a new one too!  Just plant that top part of the pineapple and take care of it like a plant.  I guess it takes about 2 years to grow a new pineapple... mine is about 2 months in so it just looks like the top of an old pineapple.)


Cut the pineapple into strips as thin as possible.  I got about 2 1/2 dozen slices out of my pineapple and all I had was a sharp knife.


You can skip this step if you want.  I put my pineapple slices into food coloring to make different colored flowers.  Just soak for a few minutes.


Pat the slices dry and lay out the pineapple slices on parchment paper.  Excess moisture will just make this whole process take longer.  Heat in the oven at about 225 degrees in 30 minute spans.  Flip them and cook for another 30 minutes.  You'll do this a couple times until they are mostly dried out (mine didn't completely dry out) and the edges are crispy and a bit curly.


You can dry them flat or you can put them into cupcake tins make more of a flower shape.  I used mini cupcake pans to get the shape I wanted.


And the end product on my pina colada cupcakes!  Some people may not like the texture of them, but they remind me of thick fruit roll up.  Kind of chewy with a good pineapple flavor.


August 13, 2012

Glass Etching!

Glass etching is one of my new favorite crafts!  It is super easy and looks fantastic!


I ventured into glass etching for the first time with a gift for a friend.  I bought a glassware set, a decanter, and a metal tray to put it all on.  Then I also bought some etching cream, which I had to buy online cause you can't buy it in Chicago... ugh.  Etching cream and spray paint.  I wonder what else you can't buy in Chicago.

It's easy to do the etching itself.  All you have to do is use contact paper or painters tape to make your design on the glass.  Then put on the etching cream and leave for about 15 minutes.


I used two different designs for the glasses.  The above shows the stripes, and the other design is in the top picture.  It is hard to tape on rounded surfaces, so I recommend trying to keep to flat ones when you start out.  The tape cannot have any bubbles in the edges or the etching cream will get under it.


The last step is to just wash off the etching cream and it's done!  My design for the decanter was to have a solid band at the smallest part of the glass then it becomes less as you move out.  It may be a bit hard to see in the photo though.


I highly recommend this project to anyone who wants to add a bit of interest to their glassware or a gift to someone else!

July 16, 2012

Tardis Cake

My friend Meg, over at Meg the Grand, has a birthday coming up.  So for her birthday party, I had to surprise her with a Doctor Who themed cake... cause if you know her, it's a necessity.

Really the best way to describe this cake is through photos.  It was a chocolate and banana cake with peanut butter brown sugar icing and chocolate fondant.  Plus all the fondant figurines!  So here goes...

The Doctor with his Tardis, a Cyberman, a Weeping Angel, some Adipose, the Silence, and Meg as the companion!  She's got a key to the Tardis!
 

Here is the video of her seeing it... someone's a bit excited.  


Meg with her figurine.

Happy Birthday Meg!

And the cake in all of its finished glory!


June 12, 2012

SW: On the Television


Who else out there watches Happy Endings?  I'm kind of in love with it.  

Reasons to watch Happy Endings... 
1. It's hilarious... that's a given.
2. It's set in Chicago!  Their Chicago doesn't make much sense, but it is here nonetheless.
3. They throw a 1920's housewarming party.  I want to go to a 1920's themed housewarming party!

  
This week's Sew Weekly challenge was to find inspiration from a TV show.  I thought about going my usual route and make something from a period costume show, but I'm in need of separates!  And I love the fashion of Jane Kerkovich-Williams on Happy Endings.  It all works out! You can check out the page here.


Also, deep down, I am just as much of a type A personality that Jane is... I just don't let it out to breathe like she does. 

This is what I used for inspiration for the challenge.


I've never liked wearing shorts or shorter skirts, but I decided to branch out and make something out of my usual comfort zone.  I've worn the skirt once and felt pretty strange in it, but the top will probably get lots of rotation in my wardrobe!


 And everything was made out of hand-me-downs from my husband's wardrobe!  The shirt is an old dress shirt and the skirt is made from a pair of khakis.


Maybe I should have used this outfit as inspiration...