August 31, 2011

Red Wine Reduction... Yum.

I love making steak with a red wine reduction sauce.  We don't buy very good cuts of meat so it probably could taste much better, but I still love it nonetheless.

Steak with Red Wine Reduction and Shallots

Steak
Cabernet Savignon, ½ bottle for the recipe and ½ bottle for you!
½ stick Butter
1-2 Shallots
2 cloves Garlic
Thyme Sprigs
Coarse Ground Salt and Pepper

Pour the  wine into a small saucepan along with a thyme sprig or two and bring it to a low boil.  Continue simmering until it’s reduced to just about ½ a cup.


Slice the shallots and mince the garlic.

Season the beef with salt and pepper.

In a large saute pan set over medium-high, melt half the butter until it begins to bubble and brown.  Add the beef.  Once it’s well browned on the bottom and comes up easily, turn it over.


Add the garlic, shallots and a couple of thyme sprigs and spread it all around and in between the steaks.


Reduce the heat to medium and continue cooking until the beef is done to your liking.  You can turn it once or twice.

Remove the steak to a platter and keep it warm.  Add the wine to the saute pan, scraping up all the stuck goodness from the bottom.  Stir until it’s reduced a little more.


Turn off the heat and add the remaining butter. Stir it in until it’s melted.

Pour the sauce over the steaks.


Garnish with thyme and serve immediately.  Enjoy!

We had ours with some homemade mashed potatoes too.
And for dessert some smoked cheese to go with the wine.  Smoked cheese is one of my new favorite things.  It doesn't seem to matter what kind of cheese... yum smoky.... 


August 30, 2011

Mexican Night

I love making salsa.  I particularly love making my recipe of salsa.  It is my favorite since it is nice and light (not like the thick liquidy stuff you get at the grocery store). 

My fiancĂ© and I love pretty much anything with the Frontera name on it.  We haven’t been able to go to any of the sit down restaurants yet, but we’ve been to the cafeteria style one in the Macy’s downtown.  But we love the tortilla chips, salsa, seasoning mixes, etc.  We paired our homemade salsa with one of the Frontera seasoning mixes for dinner.  It was yummy.


August 29, 2011

General Tso's

I made some General Tso's chicken earlier this week.  And since I haven't had time to post too much lately, I thought I'd post some of my favorite recipes.


I found this recipe on foodgawker.

General Tso’s Chicken

serves 4
total time: about 30 minutes
1/2 cup brown sugar
3 tablespoons hoisin sauce
3 tablespoons rice wine vinegar
3 tablespoons ketchup
2 tablespoons soy sauce
1/2 cup water
3-4 tablespoons cornstarch
1 pound boneless, skinless chicken breasts, cut into 1-inch cubes
1 tablespoon olive oil
1 tablespoon sesame oil
6-8 green onions chopped, plus more for serving
3 tablespoons fresh ginger, finely chopped or grated
hot pepper flakes (optional)
sesame seeds (optional)
hot rice, for serving

In a small bowl, mix together the brown sugar, hoisin sauce, rice wine vinegar, ketchup, soy sauce and water. Set aside.


In a large skillet, heat the olive oil. Dredge the chicken in the cornstarch and shake off any excess.


Cook the chicken in the olive oil until browned. Remove the chicken from the skillet and cover with foil to keep warm.


Using a paper towel, wipe the skillet clean. Add the sesame oil, green onions and ginger. Cook until fragrant, about 1 minute. Add the sauce mixture and bring to a boil. Simmer mixture for 2 minutes, or until the sauce thickens a bit. Add the chicken back into the skillet, toss to coat with sauce, and continue cooking until the chicken is cooked through.


Serve garnished with green onions, hot pepper flakes (if desired) and sesame seeds (if desired).


August 28, 2011

Gift Giving!


The gift I previously mentioned of homemade candles in bottlecaps is being put in the mail tomorrow!  So watch your mail everyone, because you might be the lucky recipient!

And the rest of you will be happy because after not posting anything for a week, I have at least one blog post for each day of this coming week!  These posts include some fantastic meals, some sewing projects, and that chalkboard globe I mentioned I wanted to make a few months ago!

August 27, 2011

Restocking the Kitchen

We were running low on some items in our cabinet so I stirred up some replacements!

First was my own hoisin sauce.

1/2 cup soy sauce
2 T peanut butter
2 T honey or molasses or brown sugar
1 1/3 T white vinegar
1/4 t garlic powder
1/4 t onion powder
1 1/3 T seasame oil
1/4 t black pepper
2/3 t chinese hot sauce

Mix everything together in a mason jar and shake well.  Enjoy!


And I made more brown sugar! You can see how low I was before with that little layer on the bottom of leftover brown sugar.


August 19, 2011

Puppy!!!


This is since I haven't been posting too much... cuteness for you.  Oh and I hit double digits in followers on the blog!  Thanks everyone! 

Hopefully next week I can get back to crafting more often.  I have a couple posts in the making that I just need to take some photos for them!

August 18, 2011

Yarn Bombing

Has anyone else heard of “yarn bombing?”  I want to see this in person!  It is where people knit coverings for items around them.  So you’ll see a tree covered in knitting… or a car… or parts of a building.  This has to take forever to do, but it’s so interesting!

Here you can read more about it and see some of what people are doing: http://yarnbombing.com/


I could go on for hours with these!  They are so much fun!

August 17, 2011

Breaking Glasses….

The internet is the “worst” resource for a crafter.  And by worst… I mean best.  I waste so much time just looking for new projects that look interesting.  My latest example of that was making my own candle holders.  I found (on Pinterest, which Meg got me addicted too) a way to make beer bottles into candle holders by slicing off the top. 

The directions that I found didn’t work out too well so I had to tweak them a good bit.  First off you gather all of your supplies:

Empty beer bottles or wine bottles
Yarn
Nail polish remover
Matches or a lighter
A sink of cold water
Sandpaper

Second, wrap the yarn around the bottle about 7-8 times and tie.  Then slide it off the top and dip in the nail polish remover.  After it is soaked through, slide it back on the bottle at the level you would like it to break.  I found that it actually broke a bit above the line. Make sure your yarn is straight though so it doesn’t break on an angle… unless you want that. 

Here comes the fun part.  Light the yarn on fire and turn the bottle slowly so it all gets heated.  Don’t catch yourself on fire or your apartment… that would not be good.  This was the time that my fiancĂ© asked where the fire extinguisher was… just in case.  He has no faith in me.  It is a controlled burn so it doesn’t do any damage or catch you on fire. 


When the flame dies out, quickly put it into the cold water.  It will break into two pieces.  Hopefully yours will crack in a straight line.  Mine were a mix of straight and jagged.  I also had a few that cracked through the glass.  So I guess make sure to have extras in case this happens to you. 

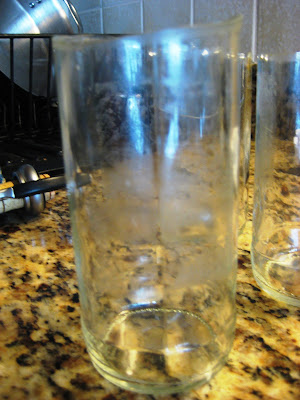
Use the sandpaper to file down the tops so they do not have sharp edges.  Then you can drop a candle in, decorate the outside, or if you really want (and had straight edges) you could use them as drinking glasses!

I’m thinking of covering mine in lace and filling it with a candle.


Oh and here's the storm that rolled our way that day...


August 11, 2011

Crafting Updates

I haven't had too much time to do crafting and sewing lately.  I was just hired on as a substitute teacher in four school districts for the upcoming year!  So my mind has been there...

I had my first wedding dress alteration earlier this week!  Nothing too spectacular and it took all of 15 minutes, if that.  But I cannot give you any clues into the dress, as I am keeping that a secret…  You’ll just have to wait it out like me!

I have been in crazy crafting mode lately.  I’m sure you could tell from all of my blog posts.  I started making candles, which I had never done before.  I’ve never been big into candles, so I don’t think that it is going to become an all the time thing, but it’s fun to experiment.  I found a way to make your own candle holders too, so when I get a chance to try that out I’ll let everyone know how it goes.  My current idea is to make some candle holders, wrap them in lace for a nice vintage feel, and put a candle in it.  This would cost me nearly nothing to make since I already have so much random crafting stuff around the apartment.

I started on a chalkboard globe a few weeks ago, but I'm still trying to find the paint for it.  I found a way to make your own, so I may end up doing that instead.  I just need to get some non-sanded grout... I'm guessing at a hardware store?
Anyone else have any ideas of what my next project should be?

August 9, 2011

Bottle Cap Candles


In continuation of yesterday’s theme, here’s another gift that will be heading out to someone.  Bottle Cap Candles!  I’m guessing you were able to deduce that by the title of this post.


I even made my own candles, that was an interesting thing to do as it was the first time I had ever tried it. I did make the mistake of using a plastic spoon to stir the hot wax.  I'm not sure why I thought that would be a good idea...


It doesn’t look like they will be able to burn for too long, but they are just so cute!


August 8, 2011

Sewing Themed Candle Holders

I’ve been in a gift giving mood lately.  Lots of big events going on.  Today’s gift is a set of sewing themed candle holders. 


I took a vintage sewing pattern and wrapped it around a votive candle holder.  A pretty easy project all around, but it looks fantastic.  


How cool is that!  I might start taking orders for these!  And one of you lucky people might be the recipient of a set of these… aren’t you just dying to find out if it is you?

August 5, 2011

Rainbow in a Jar!

I first saw a photo of this on Foodgawker.com and though it was one of the coolest things ever.  I have a friend who loves everything rainbow (hence the rainbow corset from an earlier post…) so it immediately went into my personal cookbook.  It is now a few months later and I still haven’t been able to find a reason to break out the recipe. 

It’s a really easy recipe.  I just bought some store white cake mix.  In case you didn’t know this, I can’t make store bought cakes.  They always fall apart on me.  But I thought since this doesn’t have to come out of the pan I should be fine.  I also was on a limited time constraint as I wanted to finish quickly.

After making the batter, I tinted each section with food coloring and layered them into the mason jars.  I only filled them about ½ full so they could rise and still have room for frosting.


Here they are ready to cook…


And the end product! 


I made frosting from scratch though and tossed some sprinkles on it. 


I then packed up a few jars to send out in the mail to a really great friend of mine who is going through some tough times.  Hopefully they will find her well and still intact!